Run a Full Node
This guide describes how to launch an Equito Full Node, which combines the Substrate binary and the Worker binary, for Equito Public Testnet on a Linux machine.
Hardware Specification
To ensure optimal performance when running a full node, the following minimum hardware specifications are recommended:
- CPU Cores: 4
- It is recommended to have at least 4 CPU cores to handle the computational load required for proof submission, transaction verification and block production.
- RAM: 8 GB
- A minimum of 8 GB of RAM is recommended to ensure that the node can store and process data efficiently without performance degradation.
- Disk Space: 8 GB
- At least 40 GB of disk space is necessary to store the blockchain data. As the blockchain grows over time, you may need to increase this to accommodate future growth.
Additional Considerations
- Network Bandwidth: Ensure that you have a stable and fast internet connection to handle data synchronization and transaction broadcasting. This is crucial as the node will connect to 20+ networks to listen to emitted messages plus intercommunication of Equito Nodes for consensus.
- Operating System: It is recommended to use a 64-bit Linux operating system to make full use of the hardware capabilities.
- Storage Type: Using an SSD is preferred over HDD for faster data access and improved performance.
Prerequisites: Docker
If Docker is not already installed and configured on your machine, please refer to the official Docker Installation guide.
Setup
Here's how to start a full node using a script.
Folder Structure
To run the Node, you need to create a folder where you will store the configuration file, the script and the logs.
At the end of the setup phase, your folder structure will look like this:
├── equito-testnet
│   ├── start-full-node.sh
│   ├── equito.yaml
Configuration File
You can download the equito.yaml configuration file in the newly created directory and fill the missing fields.
You will set your private key and the RPC endpoints for all the different networks. For example:
private-key: 0x<your-private-key>
evm:
  - chain: Ethereum
    id: 1
    endpoint: https://ethereum.infura.io/v3/<API-KEY>
  - chain: BSC
    id: 56
    endpoint: https://bsc-rpc.my-rpc-provider.com
# more networks ...
In the endpoint field, ensure the URL starts with http or https. Keep in mind that node is expected to make around 90k requests per day per network to http endpoints.
Note: The private testnet configuration can't be used in the public testnet. If you were running a node for the private testnet, we suggest you to start from a clean configuration file and fill the private key and endpoint fields.
IP Network configuration
Port 9944 is used by the Equito Node to listen for RPC calls and by the Worker to participate in the message verification protocol. Access to this port from external sources should be restricted to ensure security. However, it can be exposed to provide RPC services to dapps, provided proper security measures are in place.
Port 30333 & 30343 are used by the Equito Node to connect with other nodes in the Network and it needs to be accessible publicly. If this port is not publicly accessible, the Node won't be able to operate. Check the service provider's documentation on how to open ports.
For example, if you are running the Full Node on an AWS EC2 instance:
- Open the AWS Management Console and navigate to EC2.
- Select the appropriate Security Group associated with your instance.
- Edit the inbound rules and add a new rule:
- Type: Custom TCP Rule
- Protocol: TCP
- Port Range: 30333
- Source: 0.0.0.0/0 (for public access)
- Repeat the same process for opening port
30343.
Startup script
Download the bash script start-full-node.sh in the newly created directory. This scripts uses the private key specified in equito.yaml to bootstrap the node and validate transactions.
Start the Full Node
start-full-node.sh will automatically start two Docker containers, one for the Equito Substrate Node named equito-node, and another for the Equito Worker named equito-worker.
Usage:
bash start-full-node.sh <name>
<name>: The name to be used for the node. eg: BigBangOperator
Run the following command in the same folder where you have the equito.yaml configuration file and the startup script start-full-node.sh.
After starting the nodes, the folder structure will look like this:
├── equito-testnet
│   ├── start-full-node.sh
│   ├── equito.yaml
│   ├── equito-node
│   │   ├── p2p_secret
│   │   ├── ......
│   │   ├── ......
│   ├── worker_db
│   ├── logs
│   │   ├── equito-worker.log
Make sure that p2p_secret is present: it's used for the peer-to-peer communication between Substrate nodes.
We provided default options for the config and logs filenames, as well as the container names, but you can change them as you prefer if you know what you are doing.
Stop or restart the services
Run the following commands to stop the services
docker container stop equito-node
docker container stop equito-worker
Run the following commands to restart the services
docker container restart equito-node
docker container restart equito-worker
Possible Logs/Errors After Starting the Node
Woker logs can be seen in logs/equito-worker.log and latest 100 logs of Equito node can be seen by running following command:
docker container logs equito-node --tail 100
After starting the node, you might encounter some errors/warning in the logs. These errors typically go away after a couple of hours once the node is fully synced.
Here are some examples of errors/logs you might see:
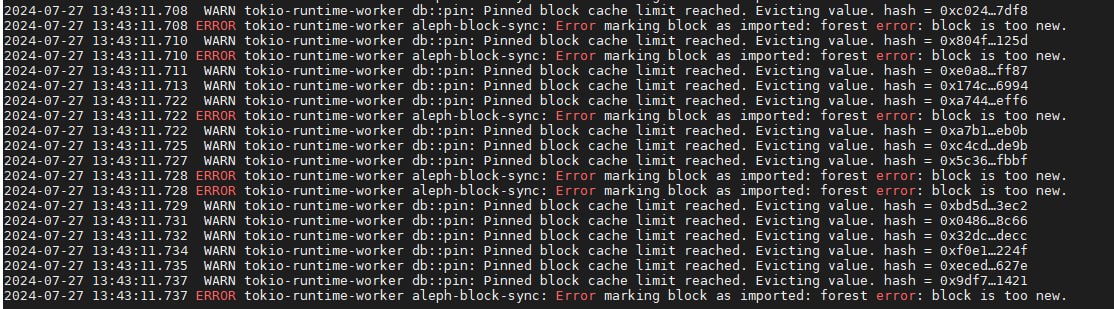
 These errors are generally related to the initial synchronization process and should resolve automatically as the node syncs with the network.
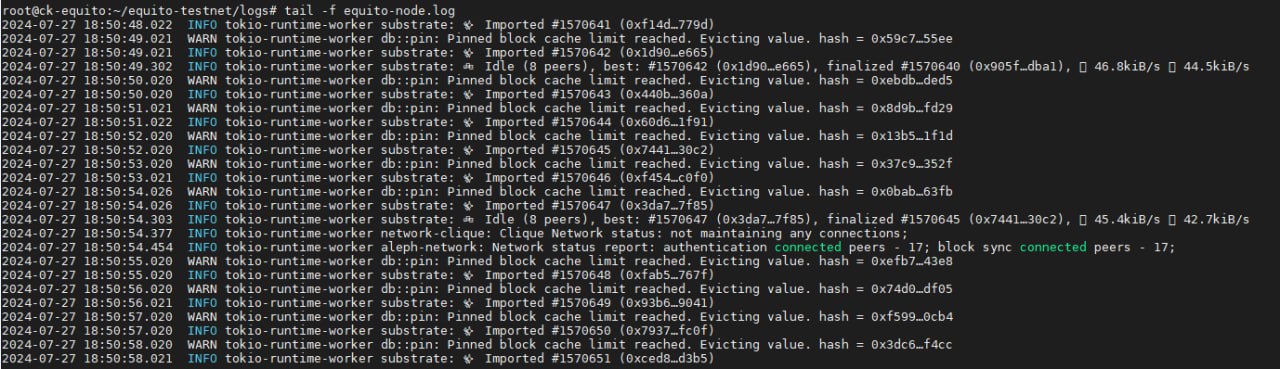
After the node is fully synced the log would appear like following
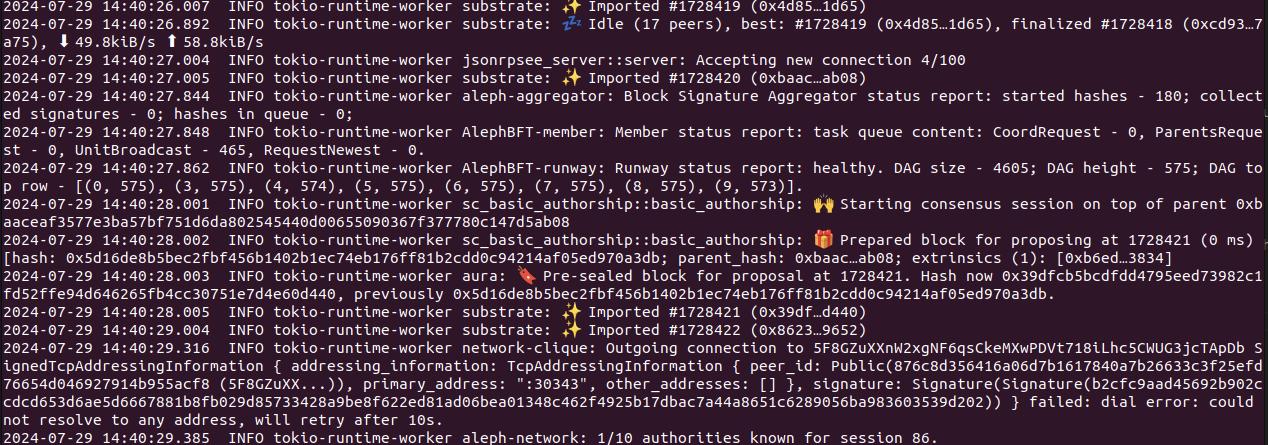
In worker, log like following is okay and means that the node account is not allowed to operate yet.
